Creating a Moss Ball
If you have a fine bucket of muck mixed, why not try your hand at making a moss ball. This is sort of the beginner's version of kusamono (apologies to all the kusamono artists out there).
The moss ball is intended to be somewhat temporary. Plants can be changed to fit the season of the bonsai tree being shown.
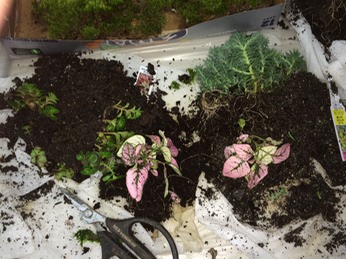
It made a great workshop for everyone to participate in. The club provided the materials (see list below) and we had more fun than kids in a mud puddle.


To try your hand at making a moss ball, you will need:
Shallow bonsai trays or use plastic mesh or tiles as a base
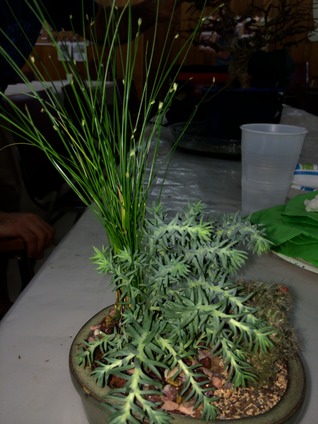
Small plants: ferns, ajuga, small grasses, modo, liriope, varigated foliage (polka-dot-plant or other variegated small leafed plants
Muck (should be very stiff), bonsai soil, plastic mesh, wire, string to wrap moss around the ball to stabilize. See the muck recipe on this blog.
Table Plastic, Gloves, Spray bottle
Moss
Mops, buckets, floor polisher...just kidding. This could be messy.
Use muck to make a base on your tray or screen. Build the sides up slightly and begin to select your plants. As you add a plant to the muck base, anchor with a bit of soil and more muck to 'glue' it in place. Add more plants to achieve the look you want. Keep buidling up the sides of the 'ball' as you work. Trim roots as needed to fit the size of the ball.
The ball may be a flattened dome or more like a 3/4 - 1/2 softball. Or make a small muck planter by dishing out the inside of a lump of muck. Depends on the look you want.
When finished with the plants, use moss to make a skin around the ball. This holds the muck and soil together. If need be, use string to wrap around the moss until it begins to grow on the muck surface. It is only a stabilizer and will rot away in a short time.
These small plantings are easy to do and can be used as companion plants to bonsai or simply enjoyed on their own.
As they are small, make sure they receive enough water to thrive but not fall apart.
Lynn